Blog

  • 12 Reasons Why WhatsApp is the Future of E-Commerce – Powered by KWIC

    12 Reasons Why WhatsApp is the Future of E-Commerce – Powered by KWIC

    In today’s fast-moving digital world, where customers want instant access and brands strive for real-time engagement, WhatsApp has emerged as the next big thing in E-Commerce. With over 2 billion users globally, WhatsApp is no longer just a messaging app—it’s a full-fledged business and commerce platform.

    Through KWIC, an official WhatsApp Business API provider, businesses—especially in Tier 2 and Tier 3 cities—can now leverage WhatsApp to simplify sales, support, and scale operations in the most intuitive way.

    Here’s why KWIC + WhatsApp = the future of e-commerce:

    1. 📈 Strong Audience Base

    WhatsApp is one of the most-used messaging platforms in India. With KWIC’s integration, your business can reach your target customers directly, without relying on third-party marketplaces or complex CRM tools.

    Whether you’re running an online store, live sale event, or hybrid commerce campaign, KWIC enables direct 1:1 communication with your audience—right where they are already active.

    2. 💬 24×7 Customer Support via WhatsApp

    Customer service has shifted from call centers to chat. With KWIC’s automation and support tools, your business can offer instant query resolution, track complaints, and provide rich experiences—all within WhatsApp.

    3. 🛍️ Sell Event Merchandise and Products

    Launch your own WhatsApp Storefront. With KWIC’s WhatsApp Commerce features, you can:

    • Share product catalogs
    • Send HD product images
    • Broadcast limited-time deals
    • Enable quick buy buttons

    Whether it’s fashion, beauty, electronics, or event merchandise—your store is open 24/7 inside WhatsApp.

    4. 🗣️ Instant Feedback Collection

    Gather feedback, reviews, and customer suggestions using WhatsApp surveys and forms. KWIC enables automated feedback journeys that help you improve products and experiences in real time.

    5. 🔐 Enterprise-Grade Security & Privacy

    Your customer data is safe. WhatsApp’s end-to-end encryption ensures that all conversations, transactions, and data shared remain secure.

    KWIC is fully compliant with WhatsApp’s business policy, ensuring your brand builds trust with every message.

    6. 🔔 Push Notifications Made Easy

    Remind customers of abandoned carts, sale updates, price drops, or back-in-stock alerts with automated WhatsApp push notifications via KWIC.

    These messages have 90%+ open rates, which is miles ahead of email or SMS.

    7. 🎁 Discounts, Coupons & Loyalty Programs

    Everyone loves a deal. With KWIC, you can send personalized discount codes and offers directly on WhatsApp, encouraging repeat purchases and rewarding loyal buyers.

    Perfect for festive sales, seasonal campaigns, and influencer promotions.

    8. 🧠 Personalization & Branding

    KWIC helps you hyper-personalize every customer interaction—from using their first name to sending tailored product recommendations.

    Add your brand logo, product links, UPI payment requests, and more—all via rich media messages inside WhatsApp.

    9. ⚡ Automated Quick Replies

    Answer FAQs, send product details, and provide order updates instantly. With KWIC’s AI-powered smart replies, you can automate 80% of customer conversations—saving time and scaling support without hiring more staff.

    10. 🚚 Real-Time Delivery Tracking

    Integrate your logistics system to send order confirmations, dispatch alerts, and live tracking links directly on WhatsApp.

    Customers can track their packages without leaving the app. Hassle-free experience = more trust and retention.

    11. 💸 WhatsApp Payments + Smart Reminders

    With UPI-based payments rolling out on WhatsApp, you can collect payments for:

    • Product orders
    • Event tickets
    • Subscriptions
    • COD confirmations

    KWIC helps automate payment reminders and confirmations, making WhatsApp a complete transaction platform.

    12. 📊 Database & User Journey Management

    When you use KWIC for WhatsApp Commerce, you gain access to advanced analytics, lead tracking, and customer behavior insights—without leaving your dashboard.

    Track:

    • Conversions from messages
    • Feedback trends
    • Campaign performance
    • Delivery and payment status

    KWIC centralizes all data to help you grow smarter.

    Why Choose KWIC for WhatsApp E-Commerce?

    ✅ Official WhatsApp Business API Provider
    ✅ Custom chatbot & catalog setup
    ✅ CRM and website integrations
    ✅ Multilingual campaign support
    ✅ Strong support team based in India
    ✅ Ideal for MSMEs, D2C brands, and local retailers

    Final Thoughts

    WhatsApp Commerce is not just the future—it’s the present reality for growth-minded brands. With KWIC as your technology and API partner, you can turn conversations into conversions and clicks into customers.

    🚀 Ready to Transform WhatsApp Into Your Best Sales Channel?

    Let KWIC help you launch your WhatsApp Storefront in 7 days.

    📞 Talk to our E-commerce Specialists
    🌐 www.kwic.in
    📱 +91 94421 55544

    KWIC – Build Conversations That Convert.

    Your trusted partner for WhatsApp API, commerce automation, and smart customer journeys.
  • How to Create a WhatsApp Chatbot: A Step-by-Step Guide for Businesses

    How to Create a WhatsApp Chatbot: A Step-by-Step Guide for Businesses

    Why a WhatsApp Chatbot is a Game-Changer for Your Business

    In today’s fast-moving, always-connected digital landscape, customers expect fast, personalized communication—and they expect it right now. With over 2 billion active users, WhatsApp isn’t just a messaging app—it’s a powerful platform where businesses can engage customers instantly.

    Enter the WhatsApp chatbot—a smart solution that automates conversations, improves customer service, and increases sales while your team focuses on what matters most. According to recent data, 82% of businesses using conversational AI report significant improvements in customer engagement, lead generation, and overall satisfaction.

    Key Benefits of Using WhatsApp Chatbots for Business

    1. Deliver Instant Customer Support

    Customers hate waiting. A WhatsApp chatbot provides real-time responses to customer inquiries—24/7. Whether it’s order tracking, product info a chatbot can handle hundreds of conversations simultaneously, eliminating wait times and improving satisfaction.

    2. Automate FAQs and Save Time

    Why repeat answers when your bot can do it for you? With a chatbot, you can automate responses to common questions—such as payment methods, return policies, delivery times—giving your team more time to handle complex issues.

    3. Boost Sales and Engagement

    A chatbot is more than a support tool—it’s also a sales assistant. It can recommend products, guide users through catalogs, collect customer data, and even initiate checkouts. With the right conversation flow, it nudges leads down the funnel without friction.

    4. Ensure 24/7 Availability

    Your chatbot doesn’t need sleep. Even outside of business hours, it ensures your customers receive timely replies, creating a responsive, customer-friendly experience across different time zones.

    WhatsApp Business API: What You Need to Know

    To build a robust WhatsApp chatbot, you’ll need access to the WhatsApp Business API. It provides the tools to automate, scale, and manage customer interactions securely and effectively.

    Key Features:

    • Real-time responses through automated conversation flows
    • Trigger-based messaging for order updates, promotions, and reminders
    • High scalability to support thousands of chats at once

    Step-by-Step Guide to Creating a WhatsApp Chatbot with KWIC

    Ready to build your chatbot? Let’s walk through the process using KWIC, a powerful automation platform designed to help businesses create WhatsApp flows with ease.

    Step 1: Design the Chatbot Flow in KWIC

    • Log in to your KWIC account
    • On the left-hand menu, navigate to “Automation” > “Bot Flow”
    • Click on “Create Flow” in the top-right corner

    You’ll now see four key components to build your chatbot

    Action

    • Send Message
    • Ask a Question
    • Ask for Address
    • Display Button

    (Example: Welcome message – “Hi there! 👋 How can we help you today?”)

    Operation

    • Use approved templates
    • Assign operator
    • Update campaign status
    • Change chat status

    (Example: Attach an approved WhatsApp template for order confirmation)

    Catalog

    • Add product listings
    • View order details
    • Clear cart options
    • (Perfect for e-commerce-based flows)

    After setting up your flow, proceed to define customer replies. Map each reply to a specific flow or keyword, allowing the chatbot to respond based on user intent.

    Create Keyword Triggers

    These trigger responses based on what customers type

    Example: Keyword “Order” triggers order status message

    Your chatbot is now ready

    Step 2: Launch and Promote Your WhatsApp Chatbot

    Once your chatbot is live, don’t forget to promote it for maximum reach:

    • Add a “Chat with us on WhatsApp” button on your website and landing pages
    • Share your WhatsApp link on social media platforms
    • Include the WhatsApp link in email signatures and SMS campaigns

    The more visibility you give your chatbot, the more effectively it can engage users.

    Final Thoughts: Powering Growth Through WhatsApp Automation

    • A WhatsApp chatbot isn’t just a cool tech upgrade—it’s a strategic tool to:
    • Build stronger customer relationships
    • Increase team efficiency
    • Drive sales 24/7

    How KWIC Helps You Succeed with WhatsApp Chatbots

    With KWIC, creating a WhatsApp chatbot is no longer a complicated task. Here’s how KWIC enhances your chatbot experience:

    • Visual chatbot builder for easy flow creation
    • Template integration for quick approvals
    • Product catalog support for seamless e-commerce
    • Unified inbox to manage all chats in one place
    • Bulk messaging to reach your entire customer base in a click
  • Why Messaging Apps Like WhatsApp Are the Future of Customer Engagement – With KWIC

    Why Messaging Apps Like WhatsApp Are the Future of Customer Engagement – With KWIC

    In today’s digital-first world, businesses must be where their customers are — and that’s on messaging apps like WhatsApp. From first interaction to final purchase (and beyond), KWIC empowers your business to drive real conversations that convert.

    🛍️ What Is the Customer Journey?

    The customer journey is the complete experience a person has with your brand — from discovering your product to making a purchase and becoming a loyal advocate.

    🌟 KWIC helps businesses:

    • Engage leads in real time
    • Build trust through conversation
    • Convert interest into action
    • Provide ongoing support
    • Encourage repeat business

    It’s not a funnel — it’s a cycle. And KWIC makes sure you’re present at every touchpoint.

    💬 Why Messaging Wins at Every Stage

    Messaging apps like WhatsApp are personal, instant, and always on. That’s why they’re ideal for:

    🔍 Awareness
    💡 Consideration
    🛒 Purchase
    🤝 Support
    🔁 Retention

    KWIC turns these everyday platforms into powerful business tools.

    Use Cases: How KWIC Works Across the Customer Journey

    1. 📣 Marketing & Lead Generation

    • Send high-converting WhatsApp broadcasts
    • Share product catalogs and offers
    • Capture leads via AI chatbots
    • Run gamified surveys or contests

    ✅ Example: A retail brand sees a 4x increase in click-through rates using KWIC-powered WhatsApp campaigns.

    2. 🧑‍💻 Pre-Sale Customer Consultation

    • Help customers choose the right product
    • Respond instantly to questions
    • Share reviews, videos, and guides inside chat

    ✅ Example: A fashion boutique helps customers match outfits by sending WhatsApp images back and forth with KWIC’s media support.

    3. 💳 Ordering and Payments

    • Collect orders directly in WhatsApp
    • Share invoices and secure payment links
    • Trigger confirmations automatically

    ✅ Example: A restaurant uses KWIC to let customers order, customize, and pay — all through chat.

    4. 🚚 Delivery Updates

    • Send real-time shipping updates
    • Offer chatbot-based tracking
    • Reduce WISMO (Where Is My Order?) requests

    ✅ Example: An e-commerce brand uses KWIC’s automation to keep customers updated every step of the way.

    5. 🛠️ Customer Support

    • Provide 24/7 responses using AI
    • Route complex issues to live agents
    • Resolve queries within WhatsApp or Telegram

    ✅ Example: A services brand handles 500+ daily support chats through KWIC’s omnichannel inbox.

    6. 💡 Retention & Loyalty

    • Share post-purchase tips and re-order reminders
    • Offer loyalty points or rewards
    • Ask for reviews or feedback through chat

    ✅ Example: A D2C wellness brand increases repeat purchases with monthly WhatsApp check-ins.

    📈 Why Businesses Choose KWIC

    KWIC Offers:

    ✅ Smart AI & automation
    ✅ Unified inbox for all channels
    ✅ Easy team collaboration
    ✅ Detailed analytics & lead tracking
    ✅ CRM integrations and Webhooks
    ✅ WhatsApp Green Tick support

    🌍 Trusted by 200+ Businesses Across India

    From local retailers to fast-growing D2C brands, KWIC helps businesses turn conversations into conversions — faster, easier, and more profitably.

    🎯 Want to Start Closing More Sales on WhatsApp?

    📞 Book Your Free Demo Now
    🌐 Visit: www.kwic.in
    📍 Based in Salem, Tamil Nadu
    📧 [email protected]

  • Exploring the Wallet and Profile Management Features in KWIC

    Exploring the Wallet and Profile Management Features in KWIC

    Managing your business profile, automation settings, team members, and payment options is made easy through KWIC’s intuitive dashboard. Whether you’re updating your WhatsApp business details or recharging your wallet for upcoming campaigns, KWIC centralizes everything under one streamlined section.

    Here’s a detailed guide on how to navigate the Wallet section and manage associated tools effectively.

    Step 1: Navigate to the Wallet Section

    From the left-hand side menu, click on My Wallet.

    This section is organized into two key areas: Channel and General.

    Channel Tab
    When you select the Channel tab, you’ll see the available business profiles connected to your WhatsApp Business account.

    Profile Information
    Click on a profile to view the following details:

    Name (EX: KWIC)

    Business ID : (ex: 12345ABC)

    Registered Phone Number : (ex: 9087xxxxxx)

    Beneath each profile, you’ll find three expandable options:

    1. Profile

    Update your business identity on WhatsApp by editing:

    • Business Name (ex: KWIC )
    • About Section (ex: Empowering businesses with seamless WhatsApp communication—automation, chatbots, and engagement tools for smarter customer interactions.)
    • Business Vertical (ex: service )
    • Business Description (ex: KWIC is seamless WhatsApp communication …. explain brief )
    • Business Address (ex: KWIC )
    • Email ID ( EX: kwic .in)
    • Website (ex: https://www.kwic.in/)

    These details help ensure your WhatsApp profile is complete and professional, building trust with your customers.

    2. Automation

    KWIC allows you to enhance customer engagement with automation tools:

    • Icebreakers: Predefined Q&A prompts to initiate conversations.
    • Commands: Set up keyword-triggered responses to streamline support and sales queries.

    3. Catalog

    Here, you can view:

    • Cart ID
    • Enable options for Cart and Card Visibility, allowing users to view and interact with your product catalog on WhatsApp seamlessly.

    General Tab

    The General section offers broader control over your team and wallet functionalities:

    1. Profile

    Select a profile to view:

    • Business ID (ex: kwic ai)
    • Phone Number (9087xxxxxx)
    • Registered Email ( EX: kwic .in))
    • Password (ex: example)

    Use the Edit button on the right side to update any of these credentials.

    2. Manage Team

    Easily add or remove team members with access to your KWIC account:

    Use the Add Team Member option to include colleagues who need access to campaigns or analytics.

    3. Wallet

    Check your available KWIC credits:

    After recharging, these credits allow you to send messages and run campaigns seamlessly.

    4. Payment History

    View a complete log of all your past transactions, including recharge dates and amounts.

    5. Tag Manager

    Organize your audience efficiently by creating tags:

    • Click on “Add Tag” on the right side.
    • Enter a Tag Name and save it for future targeting and segmentation.
  • How to Create a WhatsApp Form in KWIC

    How to Create a WhatsApp Form in KWIC

    Creating a WhatsApp form using the KWIC platform is a simple and structured process. It involves designing a conversational flow, integrating it with your WhatsApp Business account, and submitting it for approval. Follow this step-by-step guide to set it up efficiently.

    Step 1: Design the Flow for the WhatsApp Form

    Begin by creating a flow that will function as your WhatsApp form. To do this, visit the Meta Playground, a tool that allows you to design interactive flows. These flows can collect key user details such as Name, Email, Company Name, and Category preferences. As you design the form, you can preview how it appears on the right side of the screen and customize it according to your business needs.

    Step 2: Build the Flow in Meta Playground

    In Meta Playground, create a new flow and define the required fields. These may include text inputs or multiple-choice questions. You’ll be able to preview how the form behaves in real time. Make sure to align the flow with your data collection goals.

    Step 3: Copy the Flow JSON

    Once your flow is complete, copy the Flow JSON. This code contains the entire structure and logic of your form and will be needed in later steps.

    Step 4: Access WhatsApp Manager via Meta Business Suite

    Log in to your Meta Business Suite account and go to WhatsApp Manager. Select your WhatsApp account, then go to the Flow section on the left-hand menu. Click “Create Flow,” assign it a name and category, and paste the previously copied Flow JSON into the edit panel on the right.

    After saving the flow, click Run and then Publish. Also, copy the preview word (e.g., “recommend”). Once published, refresh the page. On the Dashboard, you’ll find the Flow ID, which will be required while creating the template.

    Step 5: Log into the KWIC Application

    Return to your KWIC dashboard and log in using your credentials. Navigate to the WhatsApp Flow section. Click the Sync button on the right-hand side. Your newly created flow will now appear in the list. Click the Edit option, paste the same Flow JSON into the provided section, and click Update to complete the integration.

    Step 6: Create a Template in KWIC

    Next, create a WhatsApp template within the KWIC platform. If you need guidance on this step, refer to the KWIC documentation titled “How to Create a Template and Submit for Approval in KWIC.” This template will act as the message that triggers the WhatsApp form flow.

    Step 7: Choose a Flow Button

    During template creation, select the Flow Button option. This enables the flow to be activated when the recipient clicks the button in the WhatsApp message.

    Step 8: Paste the Flow ID

    In the flow button configuration, paste the Flow ID and the Preview word (e.g., “recommend”) that you copied earlier in Step 4. This links your button to the specific WhatsApp form flow.

    Step 9: Submit the Template for Approval

    Once the template is completed, submit it for approval by WhatsApp (Meta). While approvals are generally processed quickly, the timeline may vary depending on Meta’s review procedures.

    Step 10: Start Using the WhatsApp Form

    After the template is approved, you can begin using the WhatsApp form in your customer engagement campaigns. Send the template to your customers so they can review and fill out the form directly within WhatsApp. Once submitted, their responses are recorded in your KWIC system.

    To view the results, go to your KWIC dashboard, navigate to the WhatsApp Flow section on the left-hand menu, and select the relevant flow. Here, you’ll be able to view all submitted data and export it for further use. Please note that data is currently available only daily, meaning you can export the form data one day at a time.

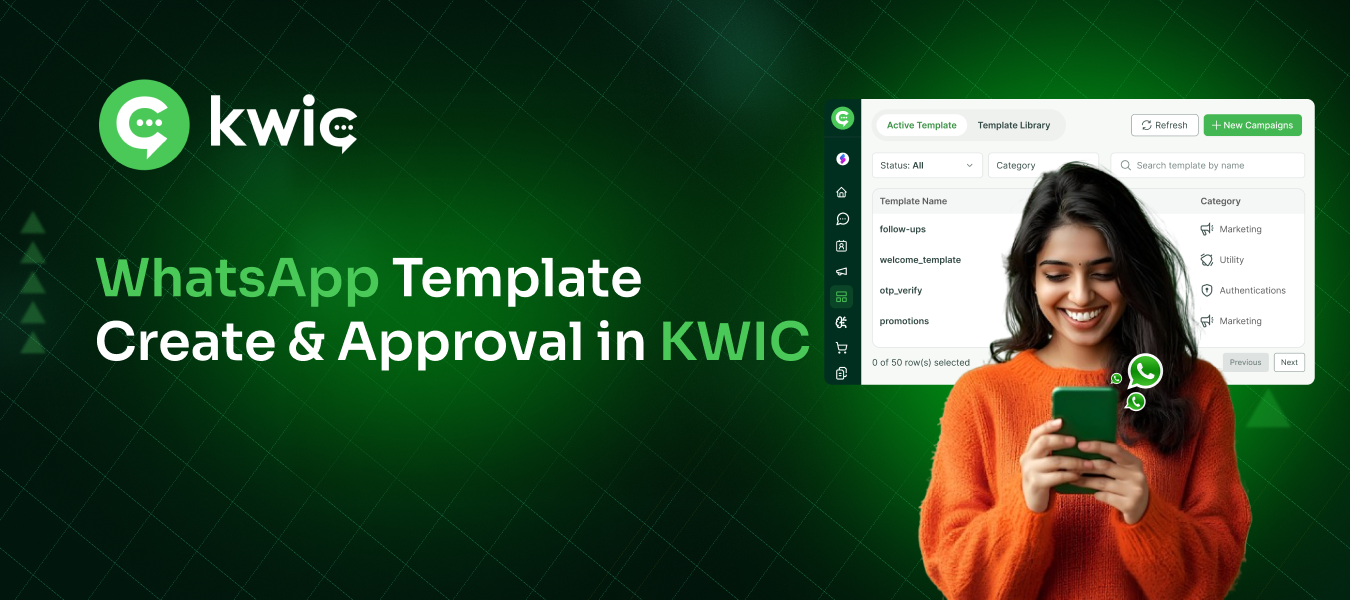
  • How to Create and Submit a WhatsApp Template for Approval in KWIC

    How to Create and Submit a WhatsApp Template for Approval in KWIC

    WhatsApp communication has become essential for businesses, and KWIC provides a streamlined platform to manage message templates efficiently. If you’re new to the KWIC system or just looking to refresh your knowledge, this guide walks you through how to create a WhatsApp template in KWIC and submit it for approval.

    Step-by-Step Guide to Creating a WhatsApp Template in KWIC

    Step 1: Log into the KWIC Platform

    Start by visiting the KWIC login page and signing in with your credentials. Once logged in, you’ll be directed to the KWIC dashboard.

    Step 2: Access the Template Section

    From the dashboard, navigate to the left-hand menu and click on the “Template” option. This will take you to the template management interface, where you can view, edit, or create message templates.

    Active Templates: Templates currently in use.

    Template Library: Predefined templates provided by KWIC.

    Step 3: Create a New Template

    Click on the “Create Template” button located on the right-hand panel. This begins the new template setup process.

    Step 4: Fill in Template Basics

    Template Name: Enter a unique name for your template (e.g., Welcome_Message).

    Category: Choose from categories such as

    • Marketing – Custom: Send promotions to increase awareness and engagement
    • Utility – Custom: Send messages related to an existing order or account
    • Authentication – One-time Passcode: Send codes to verify a transaction or login

    Language: Select the language for your message (e.g., English).

    Step 5: Choose a Header Component

    KWIC allows you to add a header to enhance your message visually or contextually. Choose from the following header options:

    • None – No header.
    • Text – Add a short text (max 60 characters).
    • Image – Upload an image (Max size: 5 MB).
    • Video – Upload a video file (Max size: 16 MB).
    • Document – Upload a document (Max size: 30 MB).

    Step 6: Add Body Content

    This is the core content of your message. Write a clear, concise message that conveys your purpose.

    Tip: KWIC provides right hand side panel as a preview to guide your formatting and structure.

    Step 7: Add a Footer

    Use the footer section to add a signature or a branded note. For instance: Powered by KWIC

    This helps enhance brand recognition.

    Step 8: Add Call-to-Action Buttons (Optional)

    You can make your message interactive by adding Call-to-Action (CTA) buttons:

    • Custom Button – Choose multiple custom actions.
    • Call Phone Number – Add a clickable number (include country code, e.g., 91).
    • Visit Website – Add a URL to direct users.
    • Copy Offer Code – Include a promo or discount code.
    • Flow – Assign a keyword to trigger a specific flow automatically.
    • Order Detail – Add specific order information dynamically.

    Step 9: Submit the Template for Approval

    Once you have completed and reviewed your template:

    • Click the “Submit for Approval” button on the right-hand panel.
    • The page will refresh, confirming your submission.
    • Your template will now enter KWIC’s approval workflow.

    Step 10: Approved Template

    • After submission, Approved Templates are available at the “Active – Template” Section.
    • It will be ready to Broadcast for single / bulk (Campaign) Contacts.
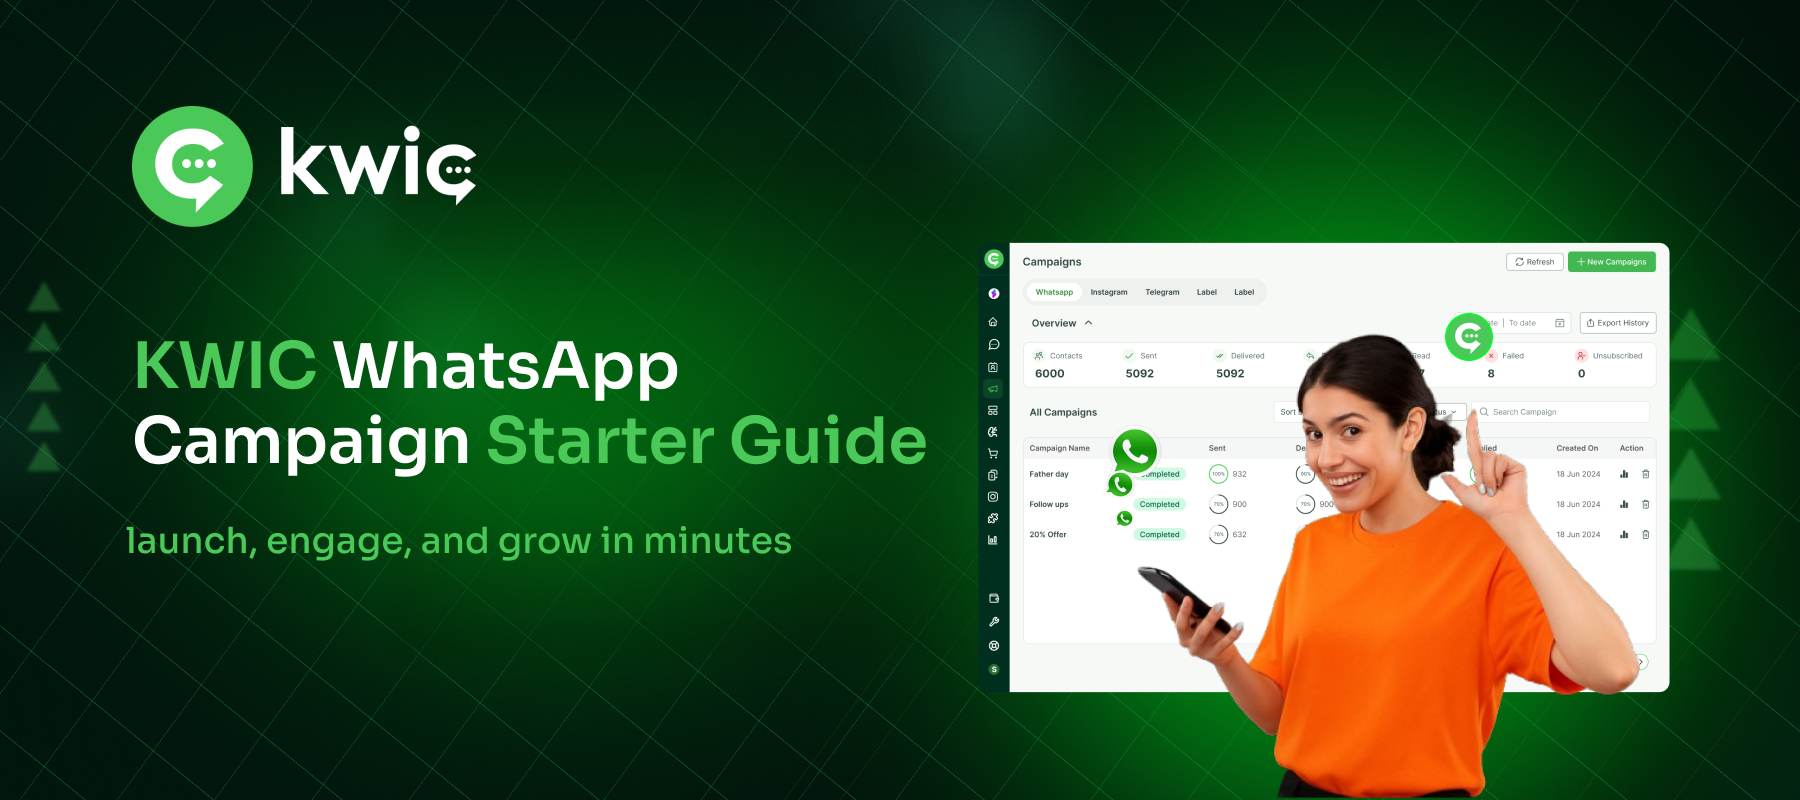
  • Complete Guide to Running Campaigns in KWIC Application

    Complete Guide to Running Campaigns in KWIC Application

    Initial Setup

    Template Approval – Your message templates must be approved by WhatsApp. (Refer to the uploaded guide for the approval process)

    Add Contacts – Upload your customer contacts with “Tags” into the system. (Refer to the uploaded guide for steps)

    Getting Started with KWIC

    • Login to KWIC – Use your credentials to log in to the KWIC dashboard.
    • Explore the Dashboard – Familiarize yourself with the layout, especially the Chat and Campaign sections.

    Campaign Types in KWIC

    • Single Contact Campaigns
    • Bulk Contact Campaigns

    Sending Single Contact Campaigns

    • Go to the Chat section from the main dashboard.
    • Click the ‘+‘ symbol on the left panel. On the right new slide will be open.
    • Enter the WhatsApp number with country code (e.g., 91 for India).
    • Choose an approved template from the list.
    • Click Send Template to deliver the message.

    Sending Bulk Contact Campaigns

    1. Create a New Campaign

    • Go to the Campaign section from the dashboard
    • Click “+ New Campaign
    • Enter a meaningful campaign name by clicking “Edit Name.”

    2. Choose a Template

    • Select a pre-approved message template.
    • Preview the selected template for accuracy (right-side preview available).
    • Click Next to proceed.

    3. Select Your Audience

    • Click the Filter button (a dialog box will open)
    • Choose relevant Tags (e.g., Team 1, Team 2)
    • If you need to apply filters based on: Date, week, or month, Attributes (include or exclude tags)
    • Select contacts by checking the box next to their names
    • Click Next

    4. Scheduling or Sending Your Campaign

    Option 1: Send Immediately

    1. Select Send Now
    2. Click Publish Campaign
    3. The campaign will be sent instantly
    4. Monitor real-time delivery status from the dashboard

    Option 2: Schedule for Later

    1. Select Schedule
    2. Choose the preferred date and time
    3. Click Publish Campaign
    4. The system will send the campaign at the scheduled time

    Tip: Scheduling allows you to send campaigns during peak engagement times or align with broader marketing plans.

    5. Campaign Analytics

    • Each Campaign has an Analytics section
    • Click the Analytics symbol on the You Need to Know campaign
    • You can see details of the Campaign Schedule, Template, and Audience
    • Also see details of Sent, Delivered, Read, Processing, Queued, Completed, and Failed Rate.
    • Hereby using the filter, you can analyze broadcasts and also “Tags” that you need to avoid sending/resending the broadcast.

    6. Re-Tags / New Tag from Campaigns Analysis

    • Go to the KWIC Profile section and assign a new tag or re-tag name.
    • From the Campaign section, locate the campaign you wish to manage.
    • Click on the Analytics icon associated with that campaign.
    • Ensure that the appropriate Tags are assigned to the contacts within the campaign.
    • On the right-hand side (RHS), click Filter and select a category:( Completed/Send/Delivered/Read/Failed )
    • On the left-hand side (LHS), tick the checkboxes to select the contacts.
    • Click Bulk Action from the RHS.
    • Under Add New Segment, choose one of the following options:-Add Tag/Remove Tag/Marketing Opt-in
    • Click Select Tag, then choose the tag(s) you want to assign.
    • Example:
      Apply a tag like “New Tag” to contacts in the Failed category (e.g., switched off or unreachable).
    • Use this tagged segment to run a focused follow-up campaign.
      Note: We do not target or disturb non-opt-in consumers. Our marketing strictly focuses on opt-in users only.

    Final Tips for Effective Campaigns

    • Monitor your campaign’s performance using real-time tracking tools
    • Analyze delivery, open, and response rates via the analytics dashboard
    • Make sure your templates are clear, relevant, and personalized for better engagement

    Conclusion

    With KWIC, WhatsApp campaign management is simple, scalable, and effective.

    Follow this guide to launch high-performing campaigns and boost your communication strategy.

  • Complete Guide: Adding Catalog for KWIC and WhatsApp Integration

    Complete Guide: Adding Catalog for KWIC and WhatsApp Integration

    Setting up a product catalog for WhatsApp through the KWIC application enables seamless e-commerce functionality, allowing customers to browse and purchase products directly through WhatsApp. This comprehensive guide walks you through the entire process from initial setup to automation, ensuring your business can leverage the full potential of WhatsApp commerce.

    Step 1: Initial Setup and Verification (Simultaneously)

    KWIC Application Login

    Begin by logging into your KWIC Application using your credentials. Once logged in, navigate to the dashboard and locate the e-commerce section. Alternatively, you can access this by going to your profile, selecting the WhatsApp channel, and choosing the catalog option, which provides similar functionality.

    Meta Business Suite Configuration

    In Meta Business Suite, begin by selecting the appropriate business portfolio. Under the ‘Account‘ section, choose the WhatsApp Business account for which you want to set up the catalog. Next, navigate to WhatsApp Manager and ensure the correct phone number linked to your business is selected. From the left-hand menu, click the icon and select ‘Commerce Manager‘ to proceed with the catalog configuration.

    Step 2: Commerce Manager Setup

    Creating Your First Product Catalog

    If you are new to adding products, the system will navigate you to the Catalog type selection. Choose from options such as online products, local products, or other relevant categories based on your business model. Select your business portfolio and provide a name for your catalog, then click Next to continue.

    Event Tracking Configuration

    At this stage, you can create event tracking if needed for analytics purposes, or skip to the next step if this is not required for your current setup.

    Product Upload Method Selection

    Choose your preferred product uploading method. You can either connect to a data feed for automated updates or opt for manual upload depending on your operational preferences. Click next to proceed.

    Data Feed Setup

    For automated uploads, select the ‘Upload File‘ option and paste your Google Sheets link. Note: A template format is provided on the right side, outlining the required structure for your feed data. Download the template and complete it accordingly—ensure that columns 1 through 10 are accurately filled, as these fields are essential for catalog functionality. All other columns are optional.

    Final Catalog Configuration

    In the confirmation step, provide your catalog name, select the appropriate currency, and set up hourly updates if desired. Once your catalog is created, navigate to the overview section where you can view your catalog items. You can also create multiple product sets under the catalog for better organization.

    Step 3: Facebook and WhatsApp Synchronization

    Connecting KWIC to Facebook

    Return to the KWIC Application and navigate to your profile, then go to the e-commerce section. Under “Effortless Product” locate the step to connect WhatsApp and copy the KWIC ID provided.

    Meta Business Suite – Data Source Configuration

    Open Meta Business Suite and navigate to the data source section. Under the catalog area, click on “Assign Partner” and paste the WhatsApp ID you copied from KWIC. Enable the “Manage Catalog” option and click Accept to complete the partner assignment.

    Completing the Integration

    Copy the catalog ID from Meta Business Suite and return to KWIC. Navigate to the e-commerce section, paste the catalog ID, and click connect. Once connected, select your products in the e-commerce section and click the sync button on the right side. Your catalog products will now be visible in KWIC.

    Product Set Synchronization

    If you have assigned products & sets, these will also sync under the catalog collections. Navigate to your KWIC profile, select the WhatsApp channel, and enable both the catalog cart and catalog visibility buttons to make your products accessible to customers.

    Step 4: Automation and Customer Flow Setup

    Creating Bot Flows

    Return to the KWIC Application and navigate to the Automation section. Select the Bot Flow creation option to design your customer interaction flows. Create comprehensive flows that include address collection, order confirmation, order details, and payment method attachment to ensure a smooth customer experience.

    Customer Reply Management

    Access the Customer Reply section in KWIC and add your designed flow materials. Navigate to the automation section, locate the “Automation Actions“, and enable the “Cart Item Received” feature. Select the particular flow you want to trigger when customers interact with your catalog items.

    Step 5: Testing and Optimization

    Comprehensive Testing Protocol

    Place test orders through your WhatsApp catalog to ensure all systems are functioning correctly. Verify that all automation flows work as expected and test the payment processing functionality thoroughly. Confirm that order confirmation and tracking systems are operating properly.

    Performance Monitoring

    Monitor your catalog performance regularly and make adjustments as needed. Ensure that your product information is accurate and up-to-date, and that your automation flows provide a seamless customer experience.

  • How to Add Contacts in KWIC: Complete Step-by-Step Guide for Single and Bulk Upload

    How to Add Contacts in KWIC: Complete Step-by-Step Guide for Single and Bulk Upload

    Effective contact management is essential for successful WhatsApp marketing, and KWIC provides efficient tools to support both single contact addition and bulk contact uploads. Whether you’re adding one customer or importing thousands, KWIC ensures your data remains organized, segmented, and ready for targeted campaigns. Its streamlined process helps you manage contacts with ease, enabling personalized messaging that drives engagement and improves conversions.

    Understanding KWIC Contact Management System

    Key Features of KWIC Contact Management

    • Tag-based Organization: Organize contacts using custom tags for targeted campaigns
    • Bulk Import Capabilities: Upload hundreds or thousands of contacts simultaneously
    • Campaign Integration: Seamlessly connect contacts to your marketing campaigns
    • Custom Parameters: Add personalized data fields for enhanced targeting
    • Multi-channel Support: Manage contacts for both WhatsApp and SMS campaigns

    Benefits of Proper Contact Organization

    • Improved Campaign Targeting: Send relevant messages to specific customer segments
    • Higher Engagement Rates: Personalized messaging based on contact tags and data
    • Efficient Campaign Management: Streamlined workflow for marketing operations
    • Better ROI Tracking: Monitor campaign performance across different contact segments
    • Compliance Management: Maintain proper opt-in records and communication preferences

    Method 1: Adding Single Contacts in KWIC

    Step 1: Login to Your KWIC Account

    Access Your Dashboard:

    • Navigate to the KWIC application login page
    • Enter your registered email address and password
    • Click “Login” to access your dashboard
    • Ensure you have proper permissions for contact management

    Step 2: Setting Up Tags for Contact Organization

    Navigate to Tag Manager:

    • From the main dashboard, locate and click on “Profile” in the navigation menu
    • Select “Tag Manager” from the dropdown options
    • This opens the tag management interface where you can create and organize contact categories

    Creating Your First Tag:

    • Click on “Add Tag” button in the Tag Manager section
    • Enter a descriptive tag name that reflects the contact category
    • Examples: “VIP Customers”, “New Subscribers”, “Cart Abandoners”, “Premium Members”
    • Click “Save” to create the tag

    Tag Creation Best Practices:

    • Use clear, descriptive names that your team can easily understand
    • Create tags based on customer behavior, demographics, or purchase history
    • Consider creating hierarchical tags (e.g., “Customers-Premium”, “Customers-Standard”)
    • Regularly review and clean up unused tags
    • Document tag purposes for team reference

    Step 3: Adding Individual Contacts

    Navigate to Contact Section:

    • Return to the main navigation menu
    • Click on “Contacts” to access the contact management area
    • Select “Add Contact” to begin the individual contact creation process

    Contact Information Entry:

    • Full Name: Enter the contact’s complete name
    • Use proper formatting (First Name Last Name)
    • Avoid abbreviations for professional appearance
    • Double-check spelling for accuracy
    • Phone Number: Input the WhatsApp-enabled phone number
    • Include country code (e.g.,91 for India, 1 for US)
    • Verify the number format is correct
    • Ensure the number is active and WhatsApp-enabled
    • Tag Assignment: Select the appropriate tag from your created tags
    • Choose the most relevant tag for campaign targeting
    • You can assign multiple tags if supported
    • Create new tags if existing ones don’t fit

    Additional Contact Details(Optional):

    Customer Parameters:

    Do you need customer details means it will be added

    Example:

    • Key : (Key Name) and Value : (Value)
    • Email address (if available for multi-channel campaigns)
    • Location information for geographic targeting
    • Customer preferences and communication frequency
    • Purchase history or customer value data
    • Custom notes for future reference
    • Click Add Contact to save Contact

    Step 4: Templates Sent to Single Contact

    • Open the Chat
    • Click the “+” Icon to Access Templates
    • Enter the Customer’s Phone Number
    • Choose a Template and Send

    Method 2: Bulk Contact Upload in KWIC

    Step 1: Accessing Bulk Upload Feature

    Navigate to Bulk Upload:

    • Login to your KWIC account using your credentials
    • Go to the main navigation and select “Contacts
    • Click on “Add Contact” and choose “Bulk Upload” option
    • This opens the contacts bulk import interface with template download options

    Step 2: Download and Prepare Excel Template

    Template Download Process:

    • Click on “Download Sample CSV
    • Save the file to a easily accessible location on your computer
    • Open the template file in Microsoft Excel / Google Sheets, or a similar spreadsheet application
    • Review the column headers and required fields

    Step 3: Excel Sheet Data Entry Guidelines

    Column-by-Column Instructions:

    Name:

    • Ensure the name and number do not include any special characters, emojis, or symbols. Only plain text (letters and numbers) is accepted.
    • special characters that might cause import errors
    • Consider using proper case (if need : First Letter Capitalized)

    WhatsApp Number:

    • Include country code for all numbers (e.g., 91 for India, 1 for USA)
    • Remove any spaces, dashes, or special characters
    • Verify each number is WhatsApp-enabled before import
    • Use consistent formatting for all number

    Broadcast Setting:

    • Enter “TRUE” to enable WhatsApp campaign inclusion
    • If you enter “FALSE” to exclude from broadcast campaigns
    • This setting controls campaign eligibility for each contact
    • Most contacts should be set to TRUE for marketing purposes

    SMS Setting:

    • Enter “TRUE” to enable SMS campaign inclusion
    • If you enter “FALSE” to exclude from SMS campaigns
    • Allows for multi-channel campaign management
    • Consider customer preferences when setting this value

    Tag Assignment:

    • Use exact tag names that already exist in your KWIC account
    • Create tags in KWIC before bulk upload if new categories are needed
    • Consistent tag naming is crucial for successful import
    • Consider using standardized tag formats across all contacts

    Key & Value (Custom Parameters):

    • Optional fields for additional customer data
    • Examples: “Purchase Date”, “Customer Tier”, “Location”, “Interests”
    • Use consistent data formats within each column
    • These fields enable advanced personalization in campaigns (e.g, key: FavroteColor, Value: Green)

    Step 4: Data Validation and Quality Assurance

    Pre-Upload Checklist:

    • Verify all phone numbers include proper country codes
    • Check that all tag names match existing tags in KWIC
    • Ensure TRUE/FALSE values are consistent for Broadcast and SMS columns
    • Remove any duplicate entries
    • Validate that all required fields are completed

    Common Data Issues to Avoid:

    • Missing country codes in phone numbers
    • Inconsistent tag naming (case sensitivity matters)
    • Empty required fields
    • Special characters in names or numbers
    • Incorrect TRUE/FALSE formatting

    Step 5: Uploading Your Contact List

    Upload Process:

    • Save your completed Excel file in .csv type with all contact data
    • Return to the KWIC bulk upload interface
    • Click “Choose File” or “Browse” to select that file
    • Click “Upload” to begin the import process

    Post-Upload Verification:

    • Wait for the upload confirmation message
    • Check for any error reports or failed imports
    • Review the imported contact count against your Excel file
    • Verify that tags and custom parameters imported correctly
    • Test a few contacts to ensure data accuracy

    Troubleshooting Common Contact Import Issues

    Excel File Format Problems

    File Format Solutions:

    • Save Excel / Google sheet files in .csv format for best compatibility
    • Avoid using “other” files unless specifically supported
    • Check for hidden characters or formatting issues
    • Ensure proper column headers match template exactly

    Phone Number Import Errors

    Common Issues and Solutions:

    • Missing Country Codes: Add country codes to all numbers
    • Incorrect Formatting: Remove spaces, dashes, and parentheses
    • Invalid Numbers: Verify all numbers are active and WhatsApp-enabled
    • Duplicate Numbers: Remove duplicate entries before upload

    Tag Assignment Failures

    Tag-Related Problems:

    • Non-Existent Tags: Create tags in KWIC before bulk upload
    • Case Sensitivity: Ensure exact tag name matches
    • Special Characters: Avoid special characters in tag names
    • Empty Tag Fields: Provide default tags for contacts without specific categories

    Best Practices for Contact Database Management

    Regular Database Maintenance

    Monthly Tasks:

    • Review and clean duplicate contacts
    • Update contact tags based on recent interactions
    • Remove inactive or unsubscribed contacts
    • Verify phone number accuracy and activity

    Quarterly Reviews:

    • Analyze contact engagement patterns
    • Update segmentation strategies based on performance
    • Review and optimize tag structure
    • Audit custom parameter usage and effectiveness

    Compliance and Privacy Considerations

    Opt-In Management:

    • Maintain clear records of consent
    • Provide easy opt-out mechanisms
    • Respect communication preferences
    • Regular compliance audits

    Data Security:

    • Secure storage of contact information
    • Regular backup of contact databases
    • Access control for team members
    • Privacy policy compliance

    Performance Optimization

    Campaign Effectiveness:

    • Track engagement rates by contact segments
    • Monitor opt-out rates and feedback
    • Analyze conversion rates across different tags
    • Optimize messaging frequency based on contact preferences

    Database Growth:

    • Implement lead magnets for organic growth
    • Create referral programs for existing contacts
    • Use social media integration for contact collection
    • Regularly update contact information
  • Complete Guide to Solving WhatsApp API Integration Issues

    Complete Guide to Solving WhatsApp API Integration Issues

    In today’s digital landscape, WhatsApp Business API has become an essential tool for businesses looking to enhance customer engagement and streamline communication processes. With over 2 billion users worldwide, WhatsApp offers unparalleled reach for businesses to connect with their customers through automated messaging, customer support, and marketing campaigns

    Understanding WhatsApp Business API Integration Challenges

    Technical Complexity and Compliance Requirements :

    WhatsApp Business API integration involves navigating Meta’s strict compliance framework, which includes multiple layers of verification, approval processes, and ongoing monitoring. Unlike simple REST APIs, WhatsApp’s system requires businesses to work through Business Solution Providers (BSPs) and maintain strict adherence to messaging policies.

    Common Integration Pain Points

    The integration process typically involves several critical components that can become sources of failure:

    Authentication and Authorization Issues

    • Token management and renewal processes
    • Webhook verification and security
    • Permission configuration errors
    • API credential mismatches

    Message Delivery and Template Management

    • Template approval workflows
    • Message formatting compliance
    • Delivery status tracking
    • Rate limiting and throttling

    System Integration Challenges

    • database synchronization
    • Real-time event handling
    • Error logging and monitoring
    • Scalability planning

    Detailed Analysis of WhatsApp API Integration Issues

    1. Authentication and Security Challenges

    Access Token Management:

    Authentication errors represent the most frequent integration challenge. These typically manifest as:

    • Expired or invalid access tokens causing API call failures
    • Incorrect app ID or phone number ID configurations
    • Webhook token verification failures
    • Permission scope mismatches between different API endpoints

    Solution Approach:

    Implement a robust token management system that includes automatic renewal mechanisms, secure token storage, and comprehensive error handling. Use environment variables for sensitive credentials and implement proper token validation before API calls.

    2. Message Delivery and Template Issues

    Template Approval Challenges:

    WhatsApp’s template system requires pre-approval for all message templates, which can be problematic because:

    • Templates may be rejected for policy violations
    • Approval processes can take 24-48 hoursbx
    • Templates have specific formatting requirements
    • Different template categories have varying approval criteria

    Message Delivery Failures

    • Invalid or improperly formatted phone numbers
    • Messages sent to users who haven’t opted in
    • Network connectivity problems
    • API rate limit exceeded errors

    Advanced Solutions:

    • Implement comprehensive phone number validation using international formatting standards
    • Create a robust opt-in management system with double confirmation
    • Develop message queuing systems to handle high-volume sending
    • Use delivery status webhooks for real-time tracking

    3. Webhook Configuration and Event Handling

    Webhook Setup Complexities:

    Proper webhook configuration is crucial for receiving real-time updates, but common issues include:

    • Incorrect webhook URL configuration
    • SSL certificate problems
    • Timeout issues during webhook verification
    • Payload processing errors

    Event Processing Challenges

    • Handling duplicate webhook events
    • Managing webhook retry mechanisms
    • Processing different event types appropriately
    • Maintaining webhook endpoint availability

    Implementation Strategy:

    Design webhook endpoints with proper error handling, implement idempotency checks, and create comprehensive logging systems for troubleshooting.

    4. Rate Limiting and Scaling Issues

    Understanding Rate Limits

    • WhatsApp implements multiple rate limiting mechanisms:
    • Messaging rate limits based on phone number tier
    • API call rate limits per application
    • Template usage limitations
    • Bulk messaging restrictions

    Scaling Solutions:

    • Implement intelligent message queuing systems
    • Use multiple phone numbers for load distribution
    • Create tier-based scaling strategies
    • Monitor and optimize sending patterns

    5. Integration with Existing Systems

    Database Integration

    • Connecting WhatsApp API with existing business systems presents challenges:
    • Data format mismatches between systems
    • Real-time synchronization requirements
    • Handling system downtime and failover
    • Maintaining data consistency across platforms

    API Documentation and Version Management

    • Keeping up with API changes and deprecations
    • Managing different API versions across environments
    • Understanding feature availability in different regions
    • Handling breaking changes in API updates

    Advanced Troubleshooting Strategies

    Diagnostic and Monitoring Tools:

    API Response Analysis-Implement comprehensive logging systems that capture:

    • Request and response payloads
    • Error codes and messages
    • Timing information for performance analysis
    • User interaction patterns

    Performance Monitoring

    • Track message delivery rates and response times
    • Monitor API endpoint availability
    • Analyze error patterns and trends
    • Set up automated alerting for critical issues

    Error Handling and Recovery

    Resilient Architecture Design

    • Implement circuit breaker patterns for API calls
    • Create retry mechanisms with exponential backoff
    • Design fallback communication channels
    • Maintain message queues for offline processing

    Data Validation and Sanitization

    • Validate all input data before API calls
    • Sanitize message content to prevent policy violations
    • Implement phone number format validation
    • Check template compliance before submission

    Comprehensive Best Practices for WhatsApp API Integration

    1. Strategic Planning and Architecture

    Pre-Integration Assessment

    • Conduct thorough requirement analysis
    • Evaluate existing system capabilities
    • Plan for scalability and growth
    • Assess compliance requirements

    Architecture Design Principles

    • Implement microservices architecture for scalability
    • Design for high availability and fault tolerance
    • Create modular components for easy maintenance
    • Plan for multi-region deployment if needed

    2. Development and Testing Strategies

    Sandbox Environment Utilization:

    • Use WhatsApp’s sandbox environment for initial testing
    • Create comprehensive test scenarios
    • Simulate various error conditions
    • Test with different user scenarios and message types

    Continuous Integration and Deployment:

    • Implement automated testing for API integrations
    • Create staging environments that mirror production
    • Use feature flags for gradual rollout
    • Maintain rollback capabilities for quick recovery

    3. Operational Excellence

    Monitoring and Alerting:

    • Set up comprehensive monitoring dashboards
    • Configure alerts for critical metrics
    • Monitor business KPIs alongside technical metrics
    • Create automated reporting systems

    4. Compliance and Security

    Data Protection and Privacy:

    • Implement GDPR and regional privacy compliance
    • Secure customer data in transit and at rest
    • Create data retention and deletion policies
    • Regular security audits and assessments

    Message Content Compliance:

    • Develop content review processes
    • Implement automated content filtering
    • Create approval workflows for template content
    • Monitor for policy violations

    Advanced Integration Techniques

    1. Multi-Channel Communication Strategy

    Unified Communication Platform

    • Integrate WhatsApp with other communication channels
    • Create consistent messaging across platforms
    • Implement intelligent routing based on user preferences
    • Maintain conversation history across channels

    2. AI and Automation Integration

    Chatbot Integration

    • Implement intelligent chatbots for automated responses
    • Create natural language processing capabilities
    • Design conversation flows for common scenarios
    • Integrate with knowledge bases and FAQ systems

    3. Analytics and Insights

    Performance Analytics

    • Track message engagement rates
    • Analyze customer response patterns
    • Monitor conversion rates from WhatsApp interactions
    • Create custom dashboards for business insights

    4. Advanced Features Implementation

    Rich Media Support

    • Implement support for images, videos, and documents
    • Create interactive message templates
    • Use location sharing capabilities
    • Implement catalog and product messaging